Our bioimaging platform houses microscopes that shed light on the tiny structures that make up plant and microbial life itself. Here we focus on the power of light microscopes, and how some of these fascinating machines work.
Not many areas in the John Innes Centre spark excitement like the bioimaging platform. Some of the institute’s most expensive equipment is housed there, with massive microscopes inhabiting their own rooms, complete with Faraday cages to prevent interference, and shock-absorbing floors and walls to prevent vibrations affecting their intricate results.
Dr Eva Wegel, senior optical microscopist, is an expert in light microscopy, and loves the images taken using these incredible machines – she is also an artist, with an eye for beauty in nature. But the images produced are not just pretty pictures; they have supported countless discoveries in plant and microbial science.
Light microscopy, also known as optical microscopy, uses light and magnifying lenses (objectives) to view samples. It’s a widely used technique in biology and other fields, for examining tissues and microorganisms. The microscopes you might have used at school use the same principles as the multi-million-pound equipment that researchers still use today.
Dr Wegel explains: “In modern day science, microscopy often aims to locate the position of proteins, pathogens, or symbiotic organisms within a plant or microbe, using a live sample.
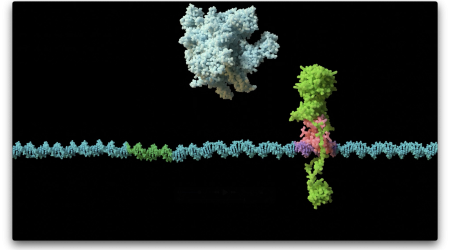
“At a microlevel, to see these structures you need to stain or ‘label’ them, because cells, organelles and proteins all become transparent at this minute level of focus. To do this we use fluorescent proteins, which come in a variety of colours, the most famous one being a green fluorescent protein naturally found in the jellyfish Aequorea victoria [see image below].
Image of the epidermis (top layer) of an Arabidopsis leaf, microtubules (part of the cell cytoskeleton) labelled with GFP Left: Widefield = blurry image Right: Confocal = crisp image
“Plants and microorganisms can be genetically modified to express these fluorescent proteins, fused to a particular protein of interest. This means that areas of our samples glow in different colours under specific lighting, helping us to differentiate what is happening inside any given plant or microbial sample.”
To take a fluorescence image under a standard microscope three components are required: a fluorescence light source to ‘excite’ fluorescent proteins, filters that allow only emitted light from the fluorescent protein to pass through the microscope, and a camera to capture the image.
This microscopy technique works well on samples that are no thicker than 10 micrometers (10 μm). Try to image thicker samples and the results from a standard light microscope will be blurry (as shown in the image above). Even the root tips of an Arabidopsis seedling are 100 μm thick, about the thickness of a human hair.
To image thicker plant material, scientists use a scanning confocal microscope, a special type of fluorescence microscope invented to remove the blur.
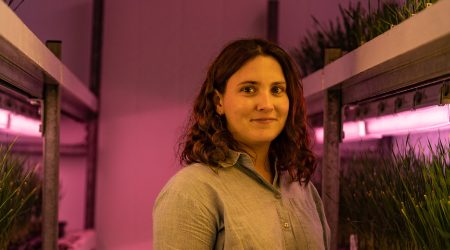
Dr Wegel with a Zeiss LSM980 Airyscan Multiplex confocal microscope
“The confocal microscope is the plant scientist’s workhorse, and it has been around since the 1980s,” Dr Wegel continues. “We have four of them, and their light detection ability and resolution have vastly improved since the initial models. These powerful tools use lasers to scan samples with pinpoint accuracy.
“Instead of capturing the whole image at once, a confocal microscope builds an image pixel by pixel, cleverly excluding light that would create a blur by means of a very small iris, called the pinhole. This results in sharp, detailed images.”
By focussing the microscope even deeper into the sample, a microscopist can create a stack of 2D images that can be converted into a 3D image, capable of showing a whole cell.
The microscope can achieve this in live plant material to depths up to 60 μm. If live samples are not irradiated with too much laser light, developmental processes in a cell can also be captured over many hours (see image below.)
These are just some of the techniques that allow researchers to peer into a hidden world, one glowing protein at a time.
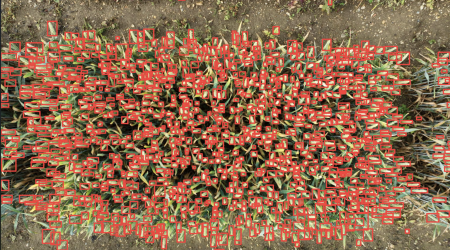
Above image caption:
These images are from a time course experiment following stomatal development in a young leaf. Cell outlines are depicted in magenta. Stomata are small pores in plant leaves which enable gas exchange. They are composed of two guard cells (shown with stars in the first 0h image) that can open or close a gap between them.
Credit: Dr Xinyu Zhang, postdoctoral researcher in Professor Robert Sablowski’s research group.
Bioimaging platform in numbers
The John Innes Centre’s bioimaging platform has 19 microscopes, including 16 light microscopes, one transmission electron microscope and two scanning electron microscopes, as well as more than 200 pieces of supporting equipment, including freezers, pumps and computers.
Between 2021 and 2024 more than £6m of BBSRC investment has helped to improve and upgrade this vital equipment.
Over the last year alone:
- Nearly 200 people used the platform, to support 102 different projects across the Norwich Research Park and UK.
- 54 different groups were supported, including research groups, start-ups and spin out companies.
- Bioimaging equipment was used for more than 9,300 hours.